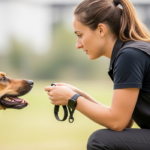
Introduction
Let’s be honest—few things make dog owners more nervous than the thought of trimming their pup’s nails. The whining, the squirming, the dreaded snip too far that leads to blood and panic… it’s enough to make anyone reach for the phone and schedule a pricey groomer instead. But what if trimming your dog’s nails didn’t have to be a battle? What if it could be calm, safe, and even bonding?
The truth is, regular nail maintenance isn’t just about neat paws—it’s essential for your dog’s comfort, posture, and long-term joint health. Overgrown nails can cause pain, alter gait, and even lead to arthritis over time. Yet many pet parents avoid it out of fear—of hurting their dog, of causing stress, or of simply not knowing where to start.
In this guide, we’ll walk you through a gentle, stress-free approach to trimming your dog’s nails at home—no vet or groomer required. You’ll learn how to read your dog’s body language, choose the right tools, avoid the “quick,” and build positive associations that turn nail care into a quiet moment of trust. Whether your dog is a wiggly puppy or a nail-trim veteran with past trauma, these tips will help you both feel more confident. Let’s turn fear into calm—one paw at a time.
Why Nail Trimming Matters (More Than You Think)
Many dog owners assume that if their pup walks on pavement or concrete regularly, their nails “wear down naturally.” While outdoor activity helps, it’s rarely enough—especially for indoor dogs, seniors, or breeds with soft nails.
Long nails change how a dog stands and moves. Imagine walking in shoes with heels that never stop growing—you’d develop back pain, poor balance, and sore feet. That’s exactly what happens to dogs with overgrown nails. Their toes splay unnaturally, pressure shifts to their wrists and elbows, and over time, this misalignment can contribute to chronic joint issues.
Additionally, long nails are prone to splitting, cracking, or getting snagged—which can lead to painful tears or even nail bed infections. In extreme cases, nails can curl back into the paw pad, causing serious injury.
The American Kennel Club recommends trimming nails every 3–4 weeks, or whenever you hear them clicking loudly on hard floors. That “click-clack” sound? It’s your cue that it’s time.
By staying on top of nail care, you’re not just keeping your floors scratch-free—you’re protecting your dog’s mobility, comfort, and quality of life for years to come.
Understanding the Anatomy: What Is the “Quick”?
The biggest source of fear around nail trimming isn’t the tool—it’s the quick. This is the soft, pinkish tissue inside your dog’s nail that contains blood vessels and nerves. Cutting into it is painful and causes bleeding, which is why so many owners hesitate.
In dogs with light-colored nails, the quick is visible as a pink core running through the nail. You’ll want to trim just before that pink zone. But in dogs with black or dark nails, the quick isn’t visible—which understandably makes things trickier.
Here’s the good news: you don’t need X-ray vision. With the right technique, you can trim safely even on dark nails. The key is to take small, gradual cuts—just the very tip of the nail at a time. You’ll know you’re getting close to the quick when the center of the nail goes from hard and white to soft and dark (like a pencil tip changing from solid lead to the softer core).
If you do accidentally nick the quick, stay calm. Apply styptic powder (or cornstarch in a pinch) to stop the bleeding. Reassure your dog with a gentle voice and a treat—but avoid making a big fuss, which can heighten their anxiety.
Remember: the quick recedes over time with regular trimming. If your dog’s nails are currently long, you may need to trim just the tips weekly to gradually shorten the quick before you can achieve a proper length. Patience pays off.
Choosing the Right Tools—and Using Them Confidently
Not all nail clippers are created equal, and using the wrong type can make the job harder (and more stressful) for everyone.
There are three main types of dog nail trimmers:
- Guillotine-style clippers: Best for small to medium dogs. The nail slides into a hole, and a blade cuts as you squeeze. Avoid if your dog’s nails are very thick or hard.
- Scissor-style clippers: Look like heavy-duty scissors. Great for larger breeds with tough nails. They offer more control and leverage.
- Nail grinders (like Dremel tools): These gently file nails down instead of cutting. Ideal for dogs who hate the “snip” sensation or have thick, black nails. They take longer but reduce the risk of cutting the quick.
Pro tip: Whichever tool you choose, keep it sharp. Dull blades crush instead of cut, which is painful and can split the nail.
Before your first real trim, practice handling your dog’s paws. Gently massage each toe during calm moments—while watching TV or during cuddle time. Offer treats and praise. This builds tolerance so paw-touching doesn’t automatically signal “nail time = scary.”
Also, have everything ready before you start: clippers or grinder, styptic powder, high-value treats (think chicken, cheese, or peanut butter), and maybe a non-slip mat to keep your dog steady.
Confidence is contagious. If you’re relaxed and prepared, your dog will pick up on that energy.
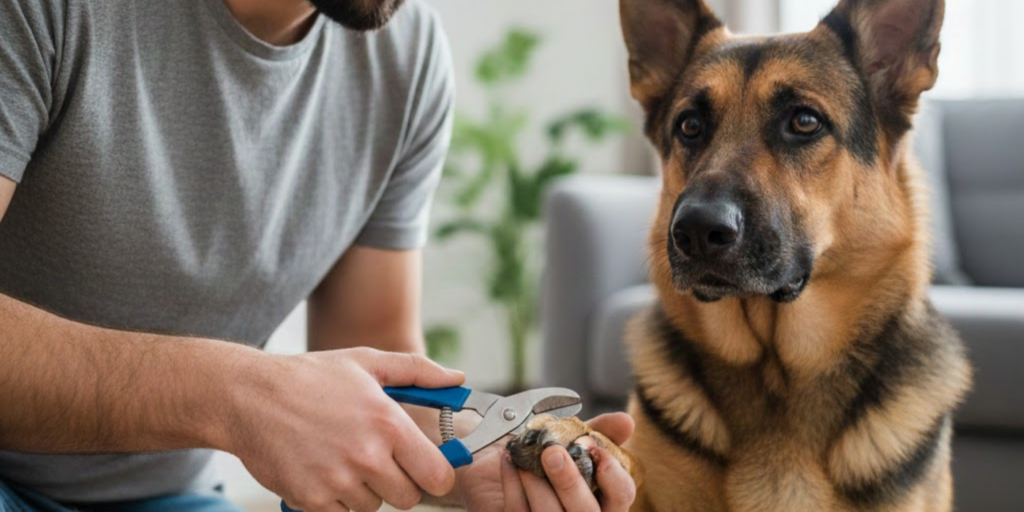
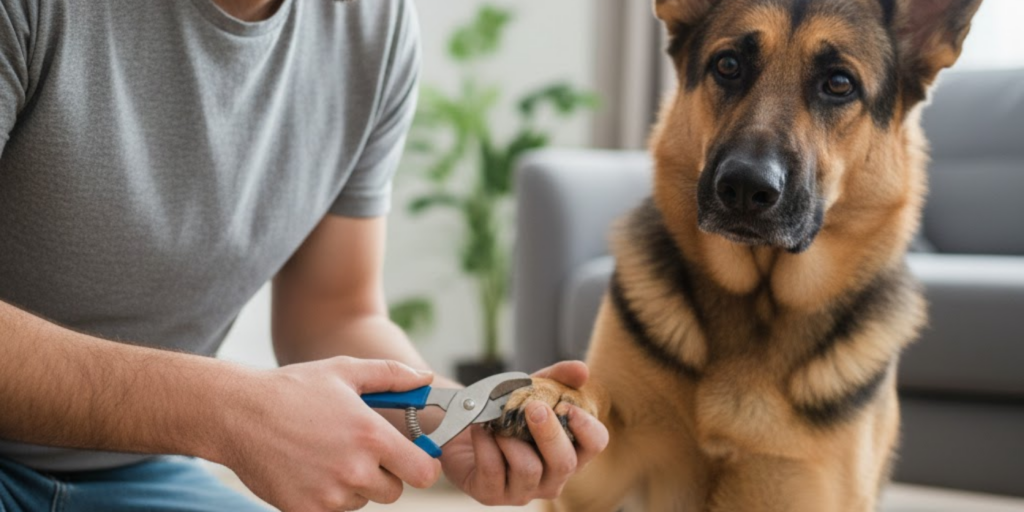
Step-by-Step Guide to a Stress-Free Nail Trim
Now, let’s walk through a calm, effective trimming session:
Step 1: Set the scene
Choose a quiet room with good lighting. Have your dog on a non-slip surface—a yoga mat or bath towel works well. If your dog is small, place them on a table at waist height (never leave them unattended!).
Step 2: Keep it brief and positive
Aim to trim just one or two nails per session at first—especially if your dog is nervous. End on a happy note before they get overwhelmed. Over time, you’ll work up to all four paws.
Step 3: Hold the paw firmly but gently
Use one hand to hold the paw, applying light pressure to extend the nail. With your other hand, position the clipper perpendicular to the nail (not at an angle).
Step 4: Trim the tip only
For light nails: cut just before the quick. For dark nails: snip off 1/16 inch at a time. Look for the color change in the center of the nail to avoid the quick.
Step 5: Reward constantly
After each nail—or even mid-session—offer a treat, praise, or a quick chin scratch. Make it a game: “Touch paw? Yes! Treat! Trim? Yes! Treat!”
Step 6: File rough edges (optional)
Use a nail file or grinder to smooth any sharp tips. Some dogs actually enjoy the vibration of a grinder once they’re used to it.
If your dog pulls away or whines, pause. Don’t force it. Try again later or split the session over two days. Consistency over time builds trust far better than one “complete” but traumatic trim.
Helping a Fearful or Resistant Dog
Some dogs tremble at the sight of clippers. Maybe they had a bad experience as a puppy, or maybe they’re just sensitive to paw handling. Whatever the reason, never punish or restrain harshly. Instead, rebuild trust through desensitization.
Start by simply placing the clippers near your dog during mealtime—no touching, just presence. Next, pick up the clippers and give a treat. Then, touch a paw while holding clippers—treat again. Gradually bridge the gap between “clippers nearby” and “actual trim.”
You can also try “touch training”: teach your dog to place their paw in your hand on cue. Reward lavishly. This gives them a sense of control.
For extreme fear, consider working with a certified positive-reinforcement trainer or a vet who offers low-stress handling. In some cases, mild anxiety supplements (like calming chews with L-theanine or CBD—approved by your vet) can help take the edge off during sessions.
Above all, go at your dog’s pace. A little progress every week is better than one stressful marathon session.
When to Call a Professional—and How to Learn From Them
There’s no shame in seeking help. Groomers and vets trim nails daily—they’ve seen it all. If your dog is aggressive, extremely fearful, or has nails that are already too long and curled, a professional can safely reset the situation.
But don’t just hand your dog over and walk away. Watch how they do it. Ask questions:
- “How do you hold the paw?”
- “Where do you cut on black nails?”
- “What treats do you use?”
Many groomers are happy to give tips or even let you practice under supervision. Think of it as a learning opportunity, not a failure.
Once your dog’s nails are at a manageable length, you can maintain them at home with confidence.
Conclusion
Trimming your dog’s nails doesn’t have to be a dreaded chore filled with stress and guilt. With the right tools, knowledge, and mindset, it can become a quiet, bonding ritual that keeps your dog healthy and comfortable for life. You’ve learned why nail care matters, how to avoid the quick, which tools work best, and—most importantly—how to turn fear into trust through patience and positive reinforcement.
Remember: your dog isn’t being “difficult.” They’re communicating discomfort or uncertainty. By responding with kindness, consistency, and small steps, you’re not just trimming nails—you’re building a deeper connection.
So take a deep breath, gather your treats, and give it a try. Even one calm nail trim is a victory. And over time, those small wins add up to a happier, healthier pup—and a more confident you.
Have you found a trick that works wonders with your dog? Struggled with dark nails or a paw-shy pup? Share your story in the comments below—we’re all learning together! And if this guide gave you the courage to try nail trimming at home, share it with a fellow dog lover who could use a little reassurance (and a lot of treats).

Mary Brown is a devoted pet enthusiast with a lifelong passion for animals of all kinds. From volunteering at local shelters to creating cozy, enriching spaces for her own furry family, she believes that every pet deserves love, comfort, and attentive care. With years of hands-on experience and a heart full of empathy, Mary shares practical tips and heartfelt insights to help fellow pet parents nurture happier, healthier lives for their companions.